


Ricardtalavera
-
Mensajes
80 -
Ingresó
-
Última visita
Visitantes recientes al perfil


Logros de Ricardtalavera
")


-
Reparacion caja Automatica discos, mecatrónica y retenes.
Ricardtalavera responde a Ricardtalavera de discusión en Audi A6 / Allroad C7 (2011-2018)
Muchas gracias !!! bueno tampoco es tanto es mas el respeto que nos infundan a si eres riguroso y meticuloso todos podemos, herramienta especial no no,solo para sacar el reten que delimita la piñonera con la mecatronica un pequeño gancho para sacarlo mejor. por lo demás, pinta y colorea de verdad, creo que todos los que nos gusta la mecánica y somos meticulosos pueden hacer este trabajo sin problemas. -
Reparacion caja Automatica discos, mecatrónica y retenes.
Ricardtalavera responde a Ricardtalavera de discusión en Audi A6 / Allroad C7 (2011-2018)
un saludo!!!! -
PERDIDA ANTICONGELANTE
Ricardtalavera responde a Shoky de discusión en Audi A6 / Allroad C7 (2011-2018)
Espero que si ya que es algo que un mecanica y si es de audi tendria que saber ya el problema con los ojos cerrados, yo me lo hice yo y solucionado, ya contaras un saludo. -
Buenas se tendría que escuchar pero muy raro, 100% que es de la caja?
-
Reparacion caja Automatica discos, mecatrónica y retenes.
Ricardtalavera publicó una discusión en Audi A6 / Allroad C7 (2011-2018)
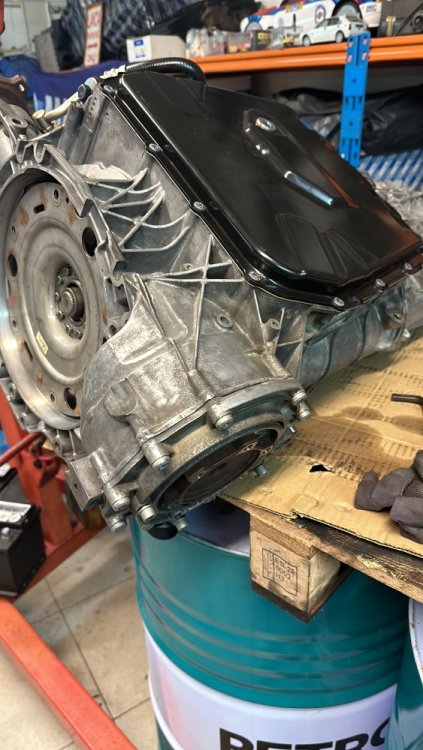
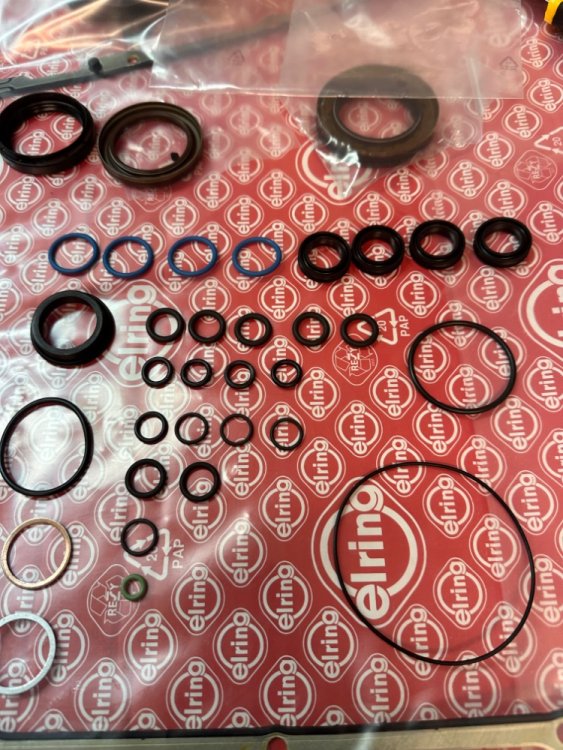
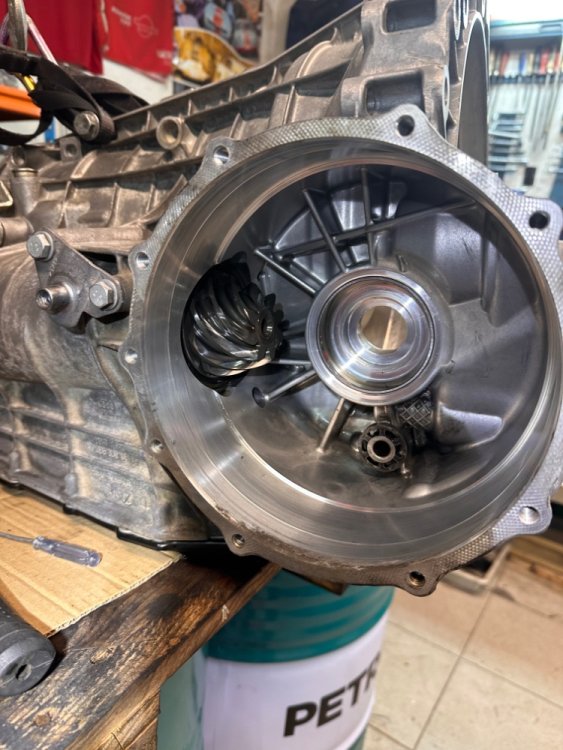
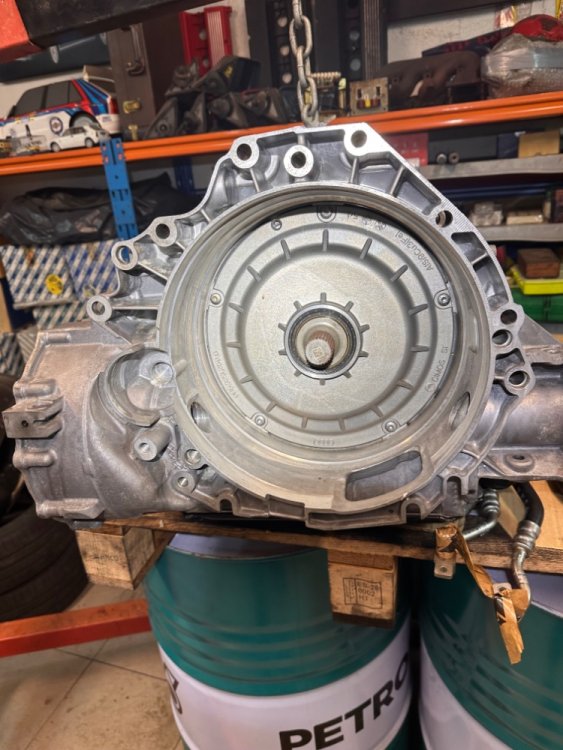
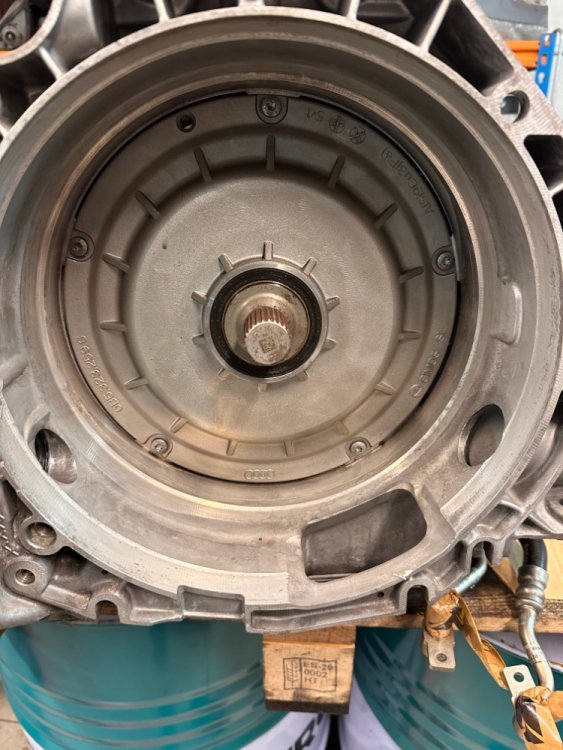
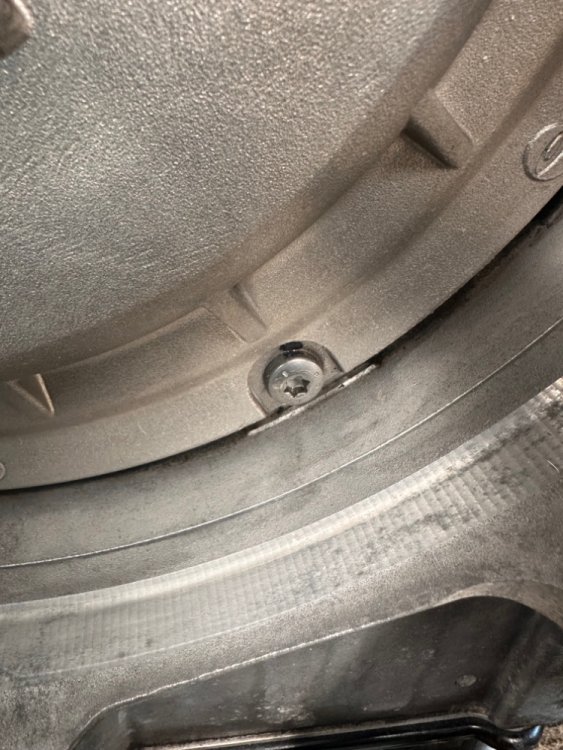
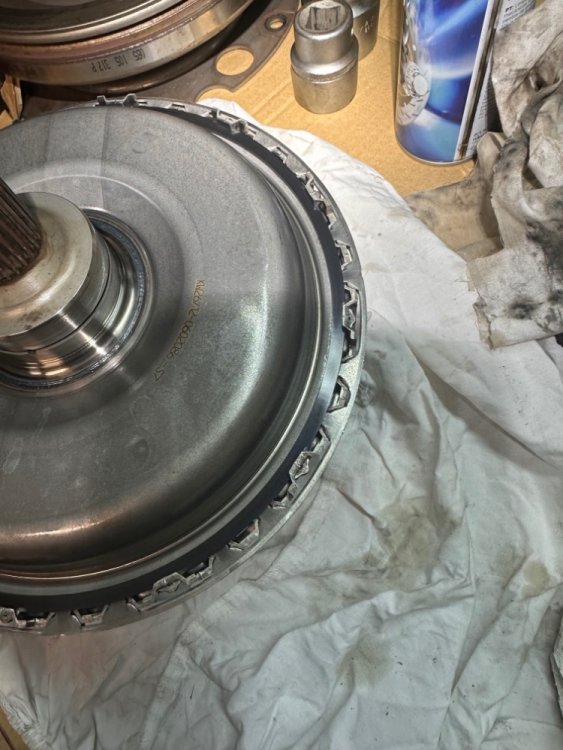
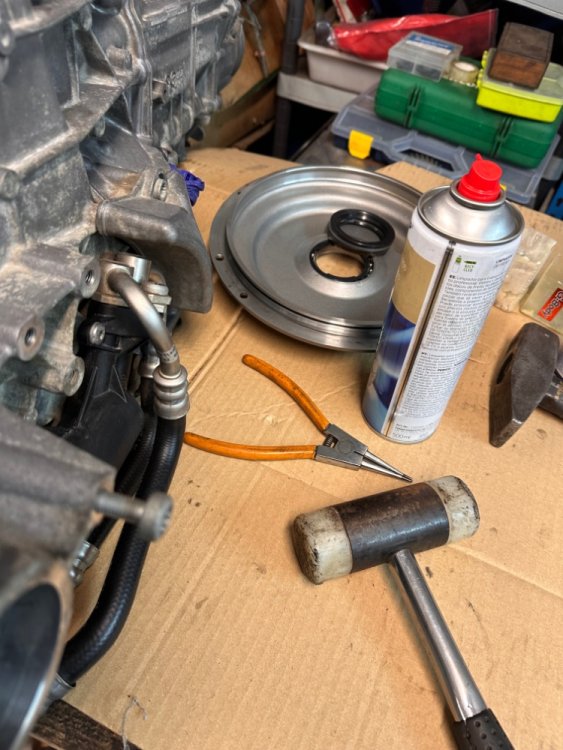
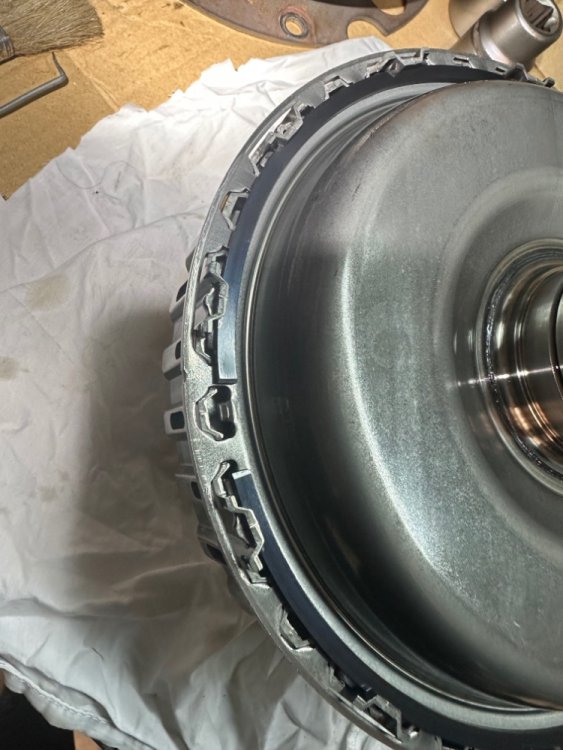
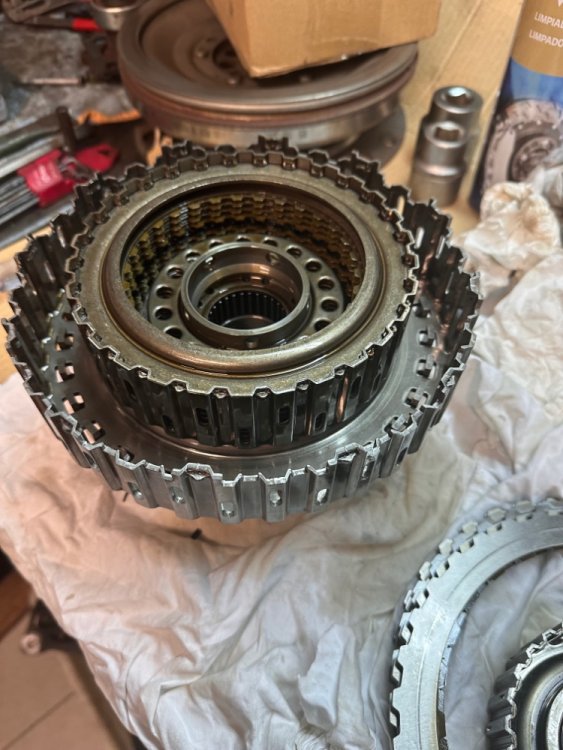
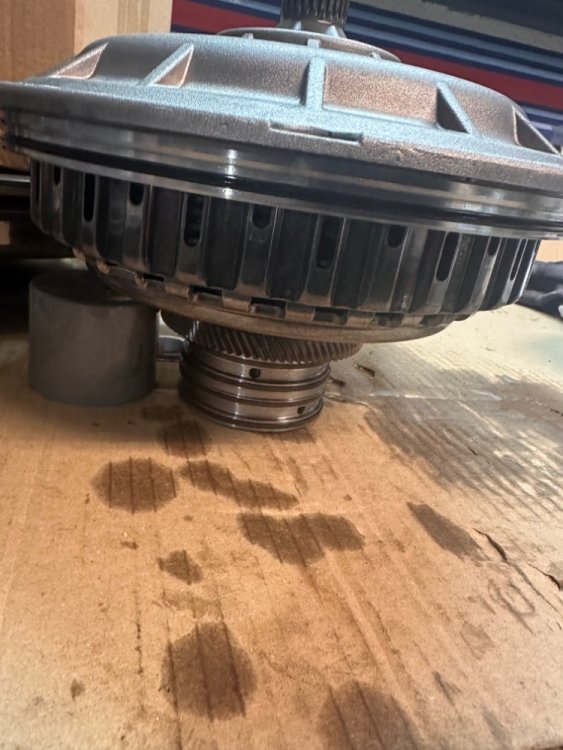
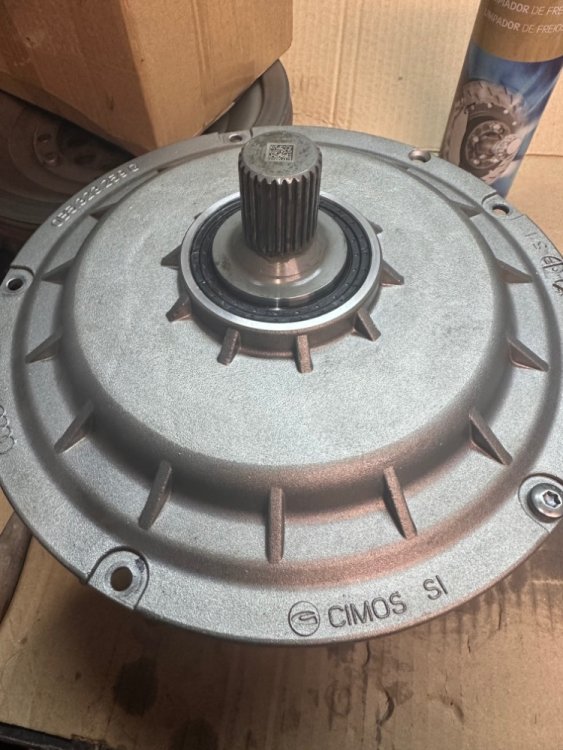
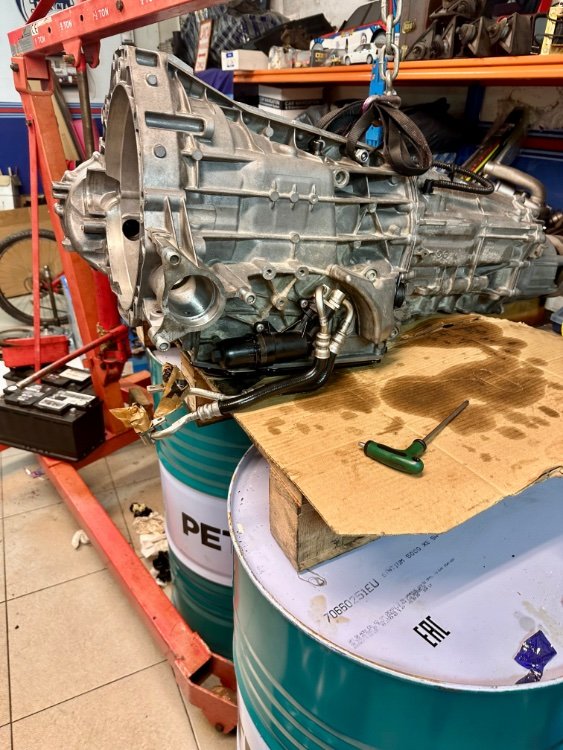
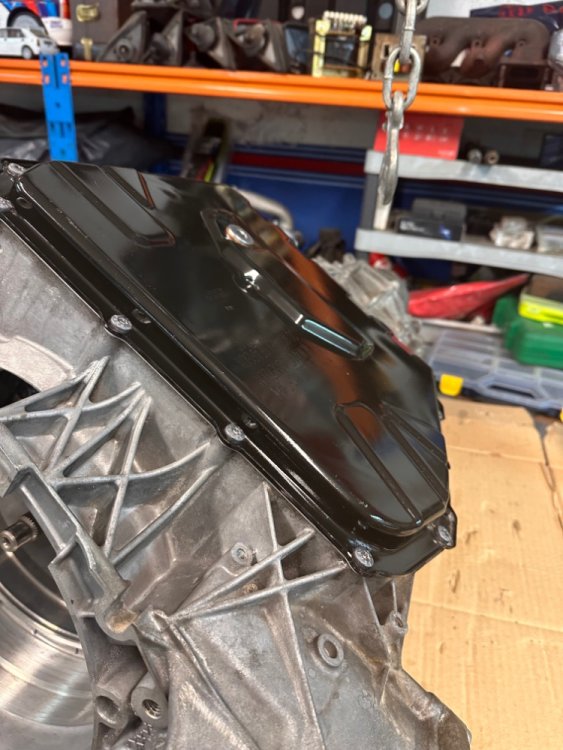
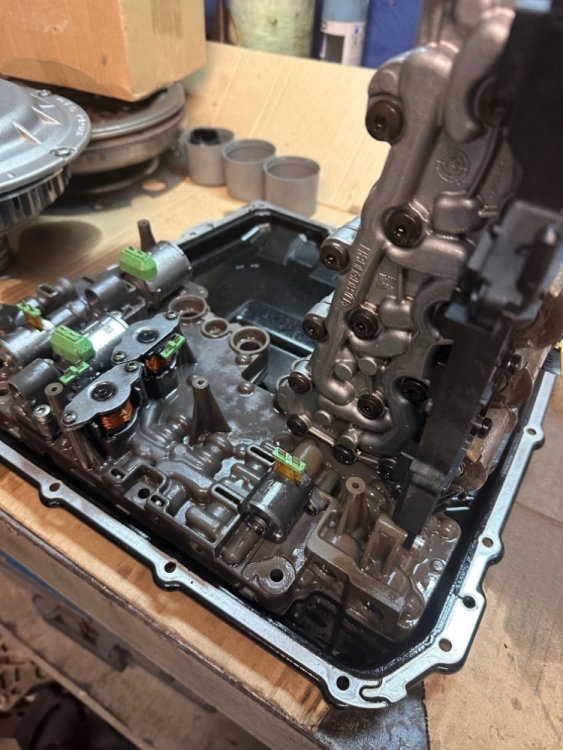
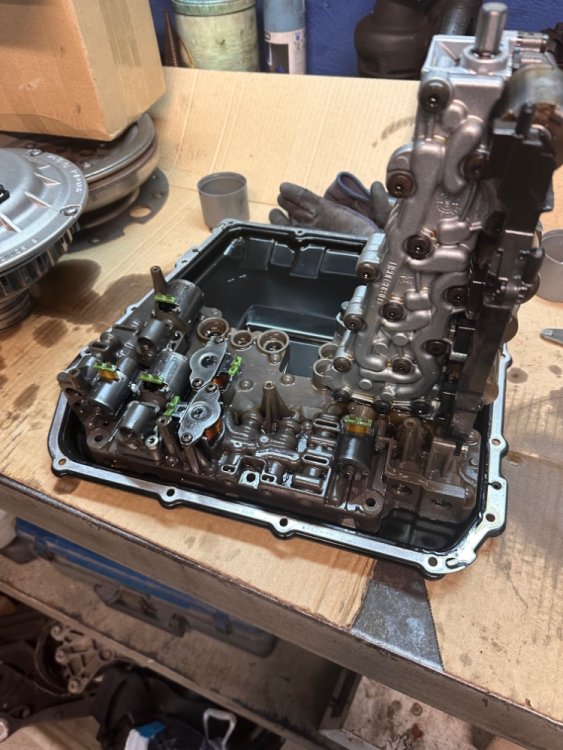
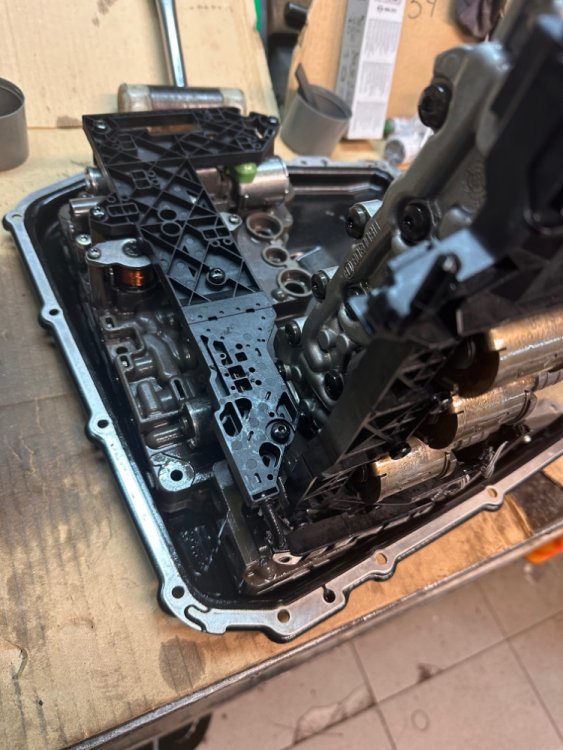
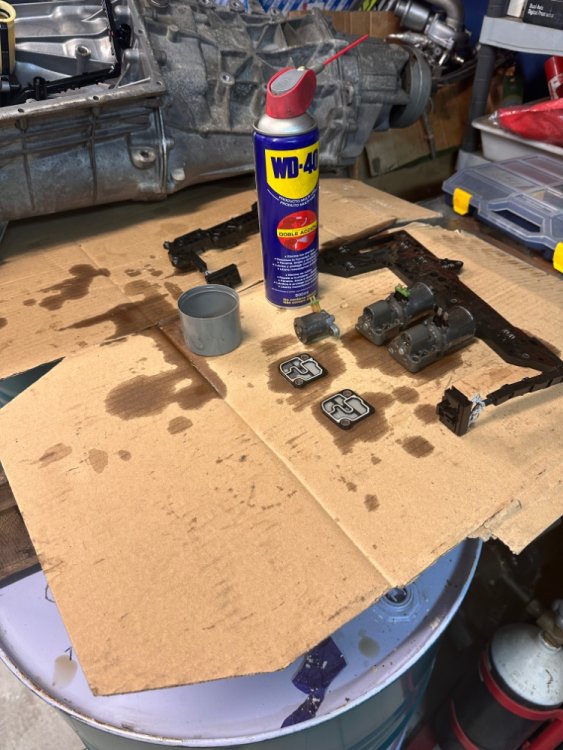
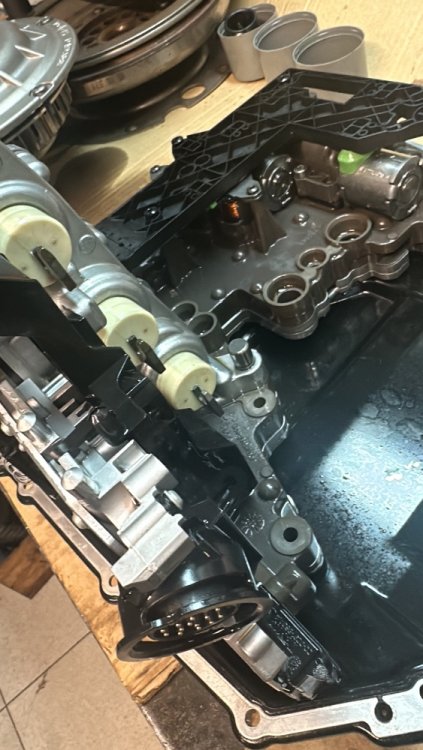
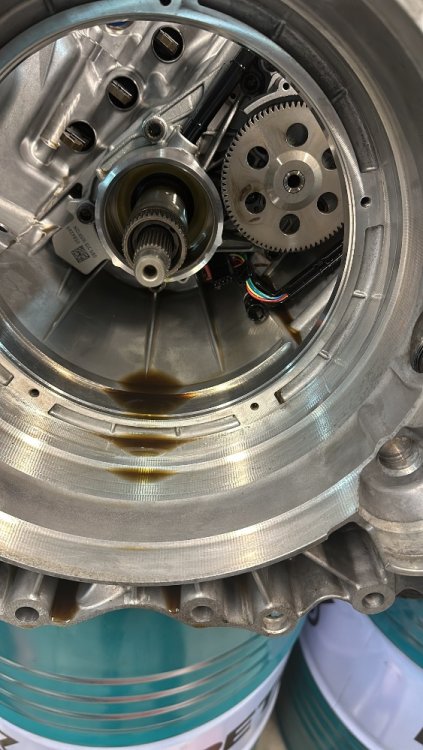
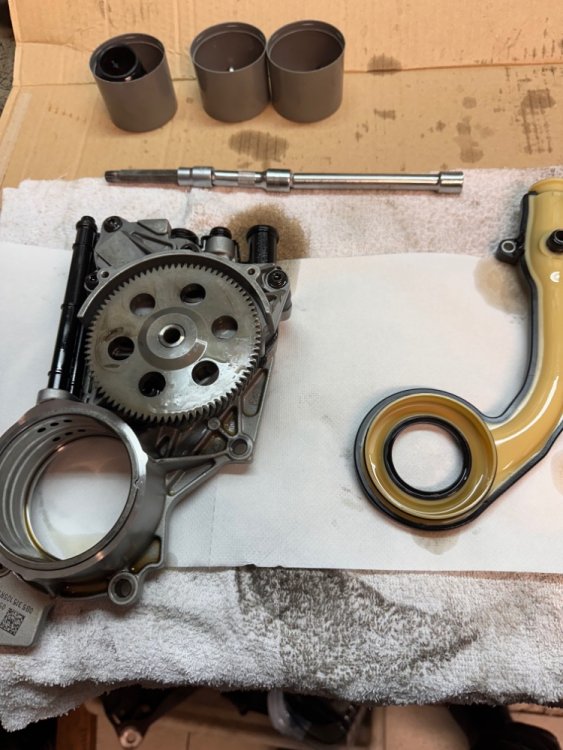
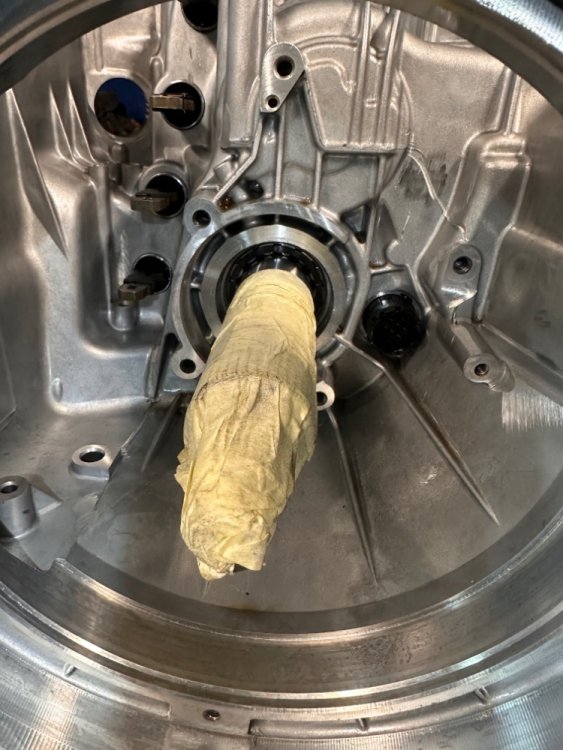
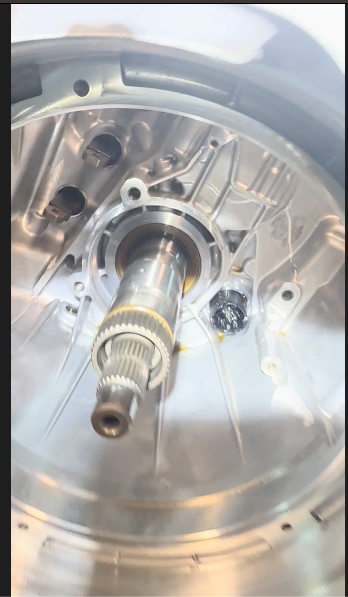
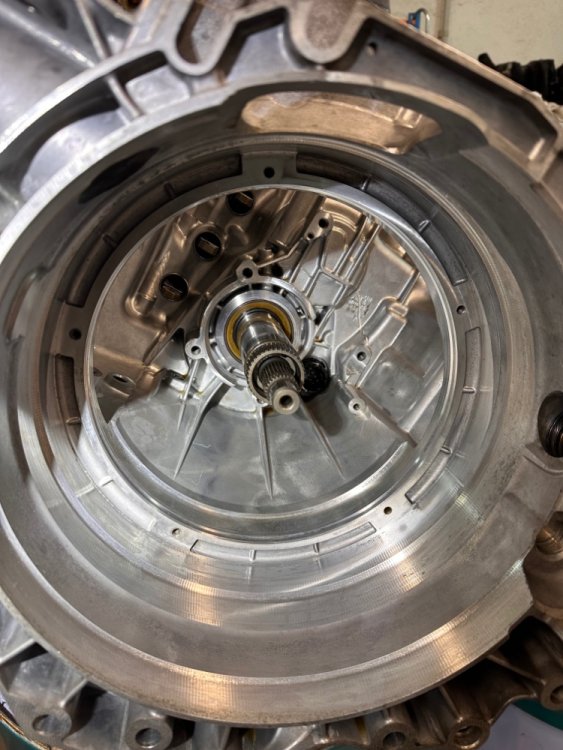
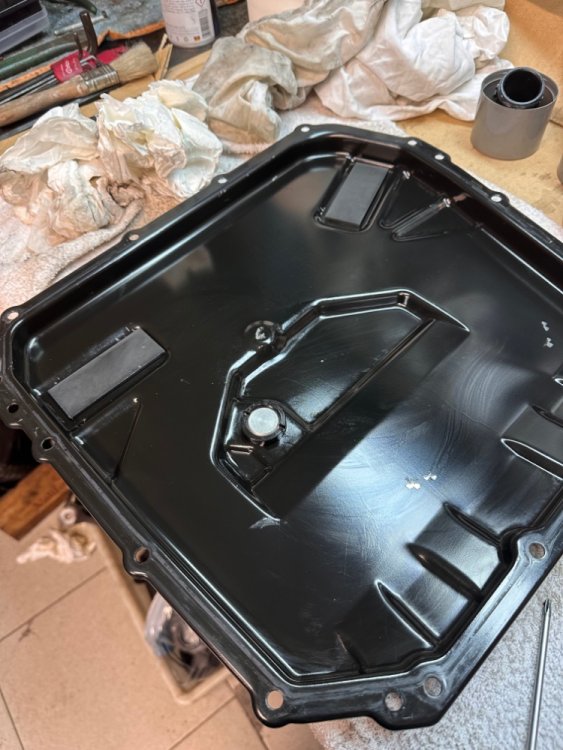
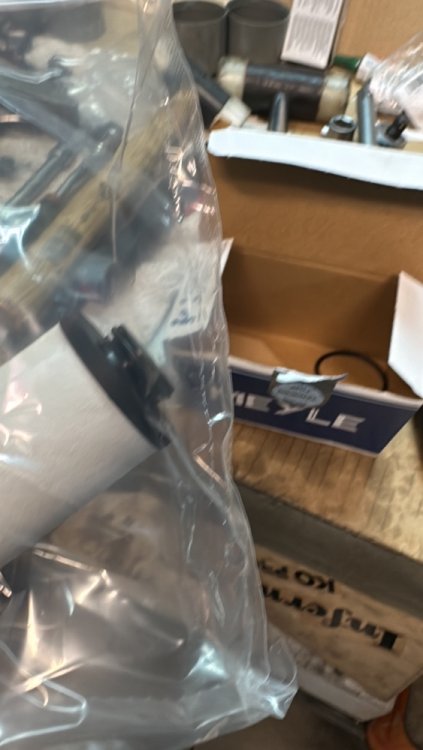
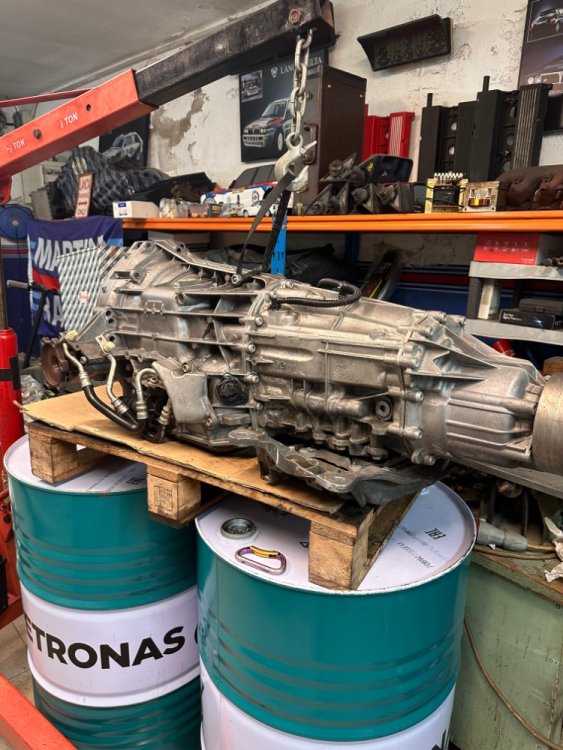
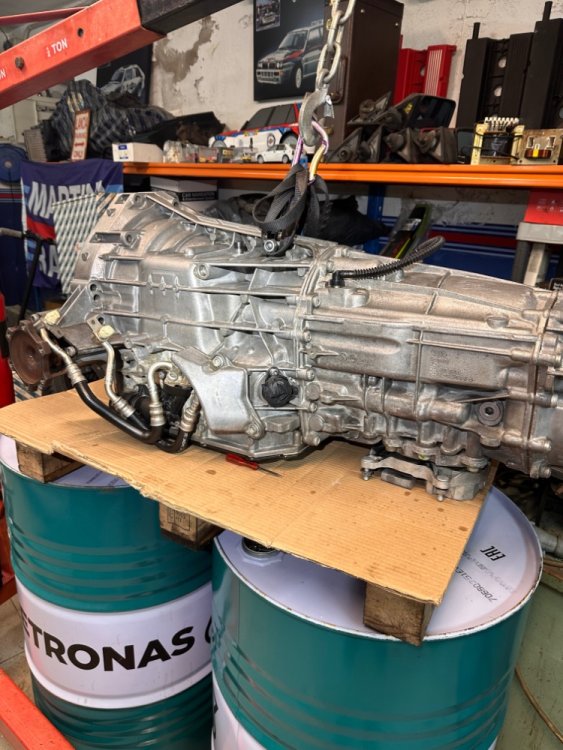
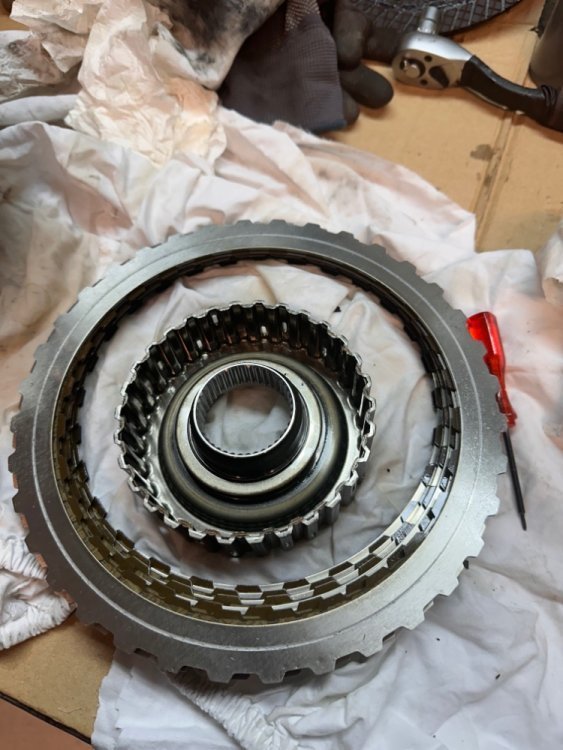
Reparacion_caja_Automatica_Discos,_Mecatronica_y_Retenes_by_RicardTalavera.pdf Hola Buenas, Bueno este finde, me he liado a restaurar la caja automática, dicos de embrague, todos los retenes, toricas y selenoides de mecatrónica y arneses limpisrla tanto por dentro como por fuera de la sal que queda de la nieve, así que bueno os explicare como lo he hecho, por si alguien se quiere animar y ahorrarse unos $. 1- para mi lo primero a sido limpiar cualquier resto que pueda ocasionar algun tipo de rallada en la que por descuido entre a la parte de la mecatronica o diferencial o cualquier otro lado. 2- Lo primero sacaremos el palier que va de lado a lado y bloquea la salida del Dumper, sacamos el arrastre del palier que va a presion por la parte del diferencial. sacamos el arrastre de palier y el diferencial para cambiar torica y retenes y aprovechamos para limpiarlo y dejarlo perfecto y ver si tiene algun desgaste anómalo. Hcemos el cambio de toricas engrasamos y retenes y cerramos con su par de apriete correcto. sacamos la campana y ya si queremos podemos sacar el reten que se ve, ya que después tendremos que sacarlo. si no sabemos el par de algun tornillo yo lo he pintado y asi ya sabre acuanto van. sacamos la campana el reten y una torica seller. una vez sacada saquemos la brida metalica ya podremos sacarla picando un poco con una maza de nylon. aqui ya podremos hacer el cambio de discos, ojo que tienen posición, y si os dió error por que patinaba quiere decir que ha rozado chapa con el fondo y se tendra que o sustituir o pulir todo bien ni solo fieron unas decimas. cuando se pongan los discos nuevos hay que empaparlos con aceite de la mecatronica, tienen que estar empapados. una vez cerrado os tiene que quedar ASi Ahora abimos la tapa del carter y sacamos la mecatronica pero para ello y MUY IMPORTANTE SACAR EL CONECTOR QUE CONECTA LA CAJA Y LA UNIDAD DEL FILTRO DE CARTUCHO QUE VA EN EL LATERAL. Una vez sacado estas dos unidades ya se puede sacar la tapa para desmontar la mecatronica, si no rompereis la unidad. aflojais la atapa y para sacar lamecatronica son seis tornillos que vereis que son sus cabezas mas pequeñas que las demás hacen 12,5mm y las otras 13 y pico. sacamos el filtro y después la mecatrónica y la colocamos para poder trabajar bien en el banco de trabajo sacamos los arneses antiguos, cambiamos selenoides limpiamos bien todo dejamos los anclajes a treinta mm para que luego a lo hora de meterla otra vez entren en sus selectores, los selectores tienen que estar en posición Neutra, si los movemos se puede ver cuando están engranadas o neutro. una vez montado arneses y cambio de selenoides dejamos con la unidades repasadas. Ahora es hora de sacar el sensor de velocidad que es un arnés, para poder sacar mejor la bomba. sacamos la bomba y sustituimos todas sus toricas. Limpiamos todo bien y protegemos el eje para sacar el doble reten por aqui, yo le hice un agujerito y con un gancho los laque bién. ya que no he querido demontar todos los otros grupos que solo he dejado dos retenes sin cambiar per que se los podria hacer en el futuro sin bajar la caja. una vez puesto os quedará como nuevo, siempre si os fijais bien entran hasta pasado el chaflan del mecanizado . Volvemos a montar y ahora si mucha limpieza colocamos mecatronica y nos aseguramos que esta todos sus anclajes dentro. cambiamos filtros. Montamos porta filtro y soporte conector despues la campana, el Dumper, palier opuesto al diferencial y ya podemos limpiarla por fuera llenamos niveles y hacemos la parte de programacion motor parado: 1 Borrar contador 2 borrar fallos 3 temperatura aceite sup 40º motor en marcha 4 calibracion valvula embrague 5 calibracion del sensor de distancia 6 apagamos motor 10´ 7 verificamos que no hay fallos. 8 si es asi vamos a dar una vuelta aver como va 9 volvemos a verificar fallos 10 todo OK espero que os sirva si alguno se anima.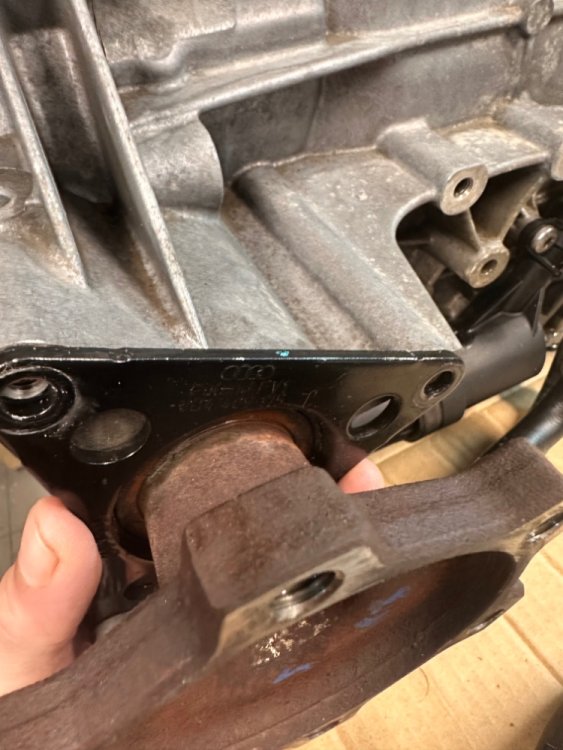


-
PERDIDA ANTICONGELANTE
Ricardtalavera responde a Shoky de discusión en Audi A6 / Allroad C7 (2011-2018)
buenas, si no te cambian la valvula de la de refrigeracion de la EGR y luego la otra pieza que es otra valvula de rtefrigeracion que va para la caja automatica, desmontar todo eso y no cambiarlo todo es volver adesmontarlo, te lo digo por experiencia, mira si en la "V" hay anticongelante, las piezas de plastico cambialas si o si por que se deforman y pierde de ahi, la junta que son dos juntas del radiador si te las han cambiado y lo han realizado correctamente lo tienes arreglado. espero que te sirva. es facil la reparacion pero hay que desmontar bastante un dia esta listo por eso. -
AYUDA CODIFICACION ILUMINACION INTERIOR LED VAG COM
Ricardtalavera responde a A6V de discusión en Audi A6 / Allroad C7 (2011-2018)
Muchísimas gracias por el BRICO en una hora todo listo perfecto así da gusto cuando compartimos, que gente más grande -
AYUDA CODIFICACION ILUMINACION INTERIOR LED VAG COM
Ricardtalavera responde a A6V de discusión en Audi A6 / Allroad C7 (2011-2018)
Puffy mil gracias si lo robare del espejo, pero bueno ahora tengo que comprar otro plafón ya que me falta la función de la cortinilla que no me di cuenta y lo compre mal.cuando lo termine lo digo si todo ok o que pronlemas he tenido para dar mas facilidades a los compañeros -
AYUDA CODIFICACION ILUMINACION INTERIOR LED VAG COM
Ricardtalavera responde a A6V de discusión en Audi A6 / Allroad C7 (2011-2018)
Lo primero darte las gracias por el brico, he comprado los plafones y sin programar nada veo que la apertuta de puertas no se enciende enteindo que es por que no lo he configurado, es así¿?¿ ya que las otras opciones "rear" y luc por demanda funcionan perfectamente. si ,e podeis dar contestacion muchas gracis de antemano. -
pilotos trasero audi A6 C7
Ricardtalavera responde a a6isi de discusión en Audi A6 / Allroad C7 (2011-2018)
https://thetechycorner.wordpress.com/2019/02/04/facelift-c7-5-style-tail-lights/ en este link esta la codificacion con vag -
pilotos trasero audi A6 C7
Ricardtalavera responde a a6isi de discusión en Audi A6 / Allroad C7 (2011-2018)
Buenas no se si tu sabras algo más, pero solo he podido encontrar chinos y siempre las modificaciones son para el modelo sedan, he encontado la codificación que luego se tiene que hacer, pero he encontrado algo muy poco y sin numeración de cuales son los numeros de los pilotos traseros que encagen bien sin cambiar guardabarros trasero, en este hilo el que lo cambió es igual que el mio un allroad, pero no me quiero gastar una pasta y que no me encajen bien. por eso estoy dandole vueltas para tenerlo todo claro, pero no lo veo. a ver si tu que sabes mas de este tema puedes ayudarme por que el hilo aleman es solo sedan. dices que los pilotos son los mismos tanto para sedan como para avant¿?¿ he visto que queda un hueco si pones los nuevos, es asi, es que en otros coches veo que queda perfecto¿?¿ la codificacion ya la tengo bueno es americana pero eso seguro que se encuentra si no sirve. si me puedes dar luz te lo agradezco muchisimo. gracias -
pilotos trasero audi A6 C7
Ricardtalavera responde a a6isi de discusión en Audi A6 / Allroad C7 (2011-2018)
-
pilotos trasero audi A6 C7
Ricardtalavera responde a a6isi de discusión en Audi A6 / Allroad C7 (2011-2018)
Menudo loser ok ok, no quiero poner los pilotos pilotos led pero los del restailing, yo llevo de led pero son los anteriores, y no la quiero liar comprando pilotos que no sirvan. También dicen que hay que codificarlos, entiendo que será un ajuste básico o tú sabes bien que hay que codificar? Para el intermitente dinámico? entiendo que entonces todos los pilotos se ajuntan bien? muchas gracias por darnos luz -
pilotos trasero audi A6 C7
Ricardtalavera responde a a6isi de discusión en Audi A6 / Allroad C7 (2011-2018)
Mil gracias de primeras, perdona pero no te entendi muy bien quieres decir con avant S2¿?¿ entiendo que luego solo se tendrá que hacer la modificacion de pines y con el vag algo mas no¿??¿ o solo poner la resistencia de la marcha atras ya que todo lo demas es led, mero los pilotos encajan correctamente. yo tengo un allroad c7 2013 y el problema es la numeración final que no se su significado y si sirven 4G5945094F signficado de la letras finales -
Cambio de pilotos led
Ricardtalavera responde a arroyano de discusión en Audi A6 / Allroad C7 (2011-2018)
Hola puedes pasarme una foto de como tienes la conexión de 4 a seis pines ya que tendré el mismo problema. muchas gracias

